How to Approve
If the autoApprove flag is set to false or is omitted (defaults to false) the plan will need to be manually approved before it can proceed with applying. Details on how and where to set these flags are here.
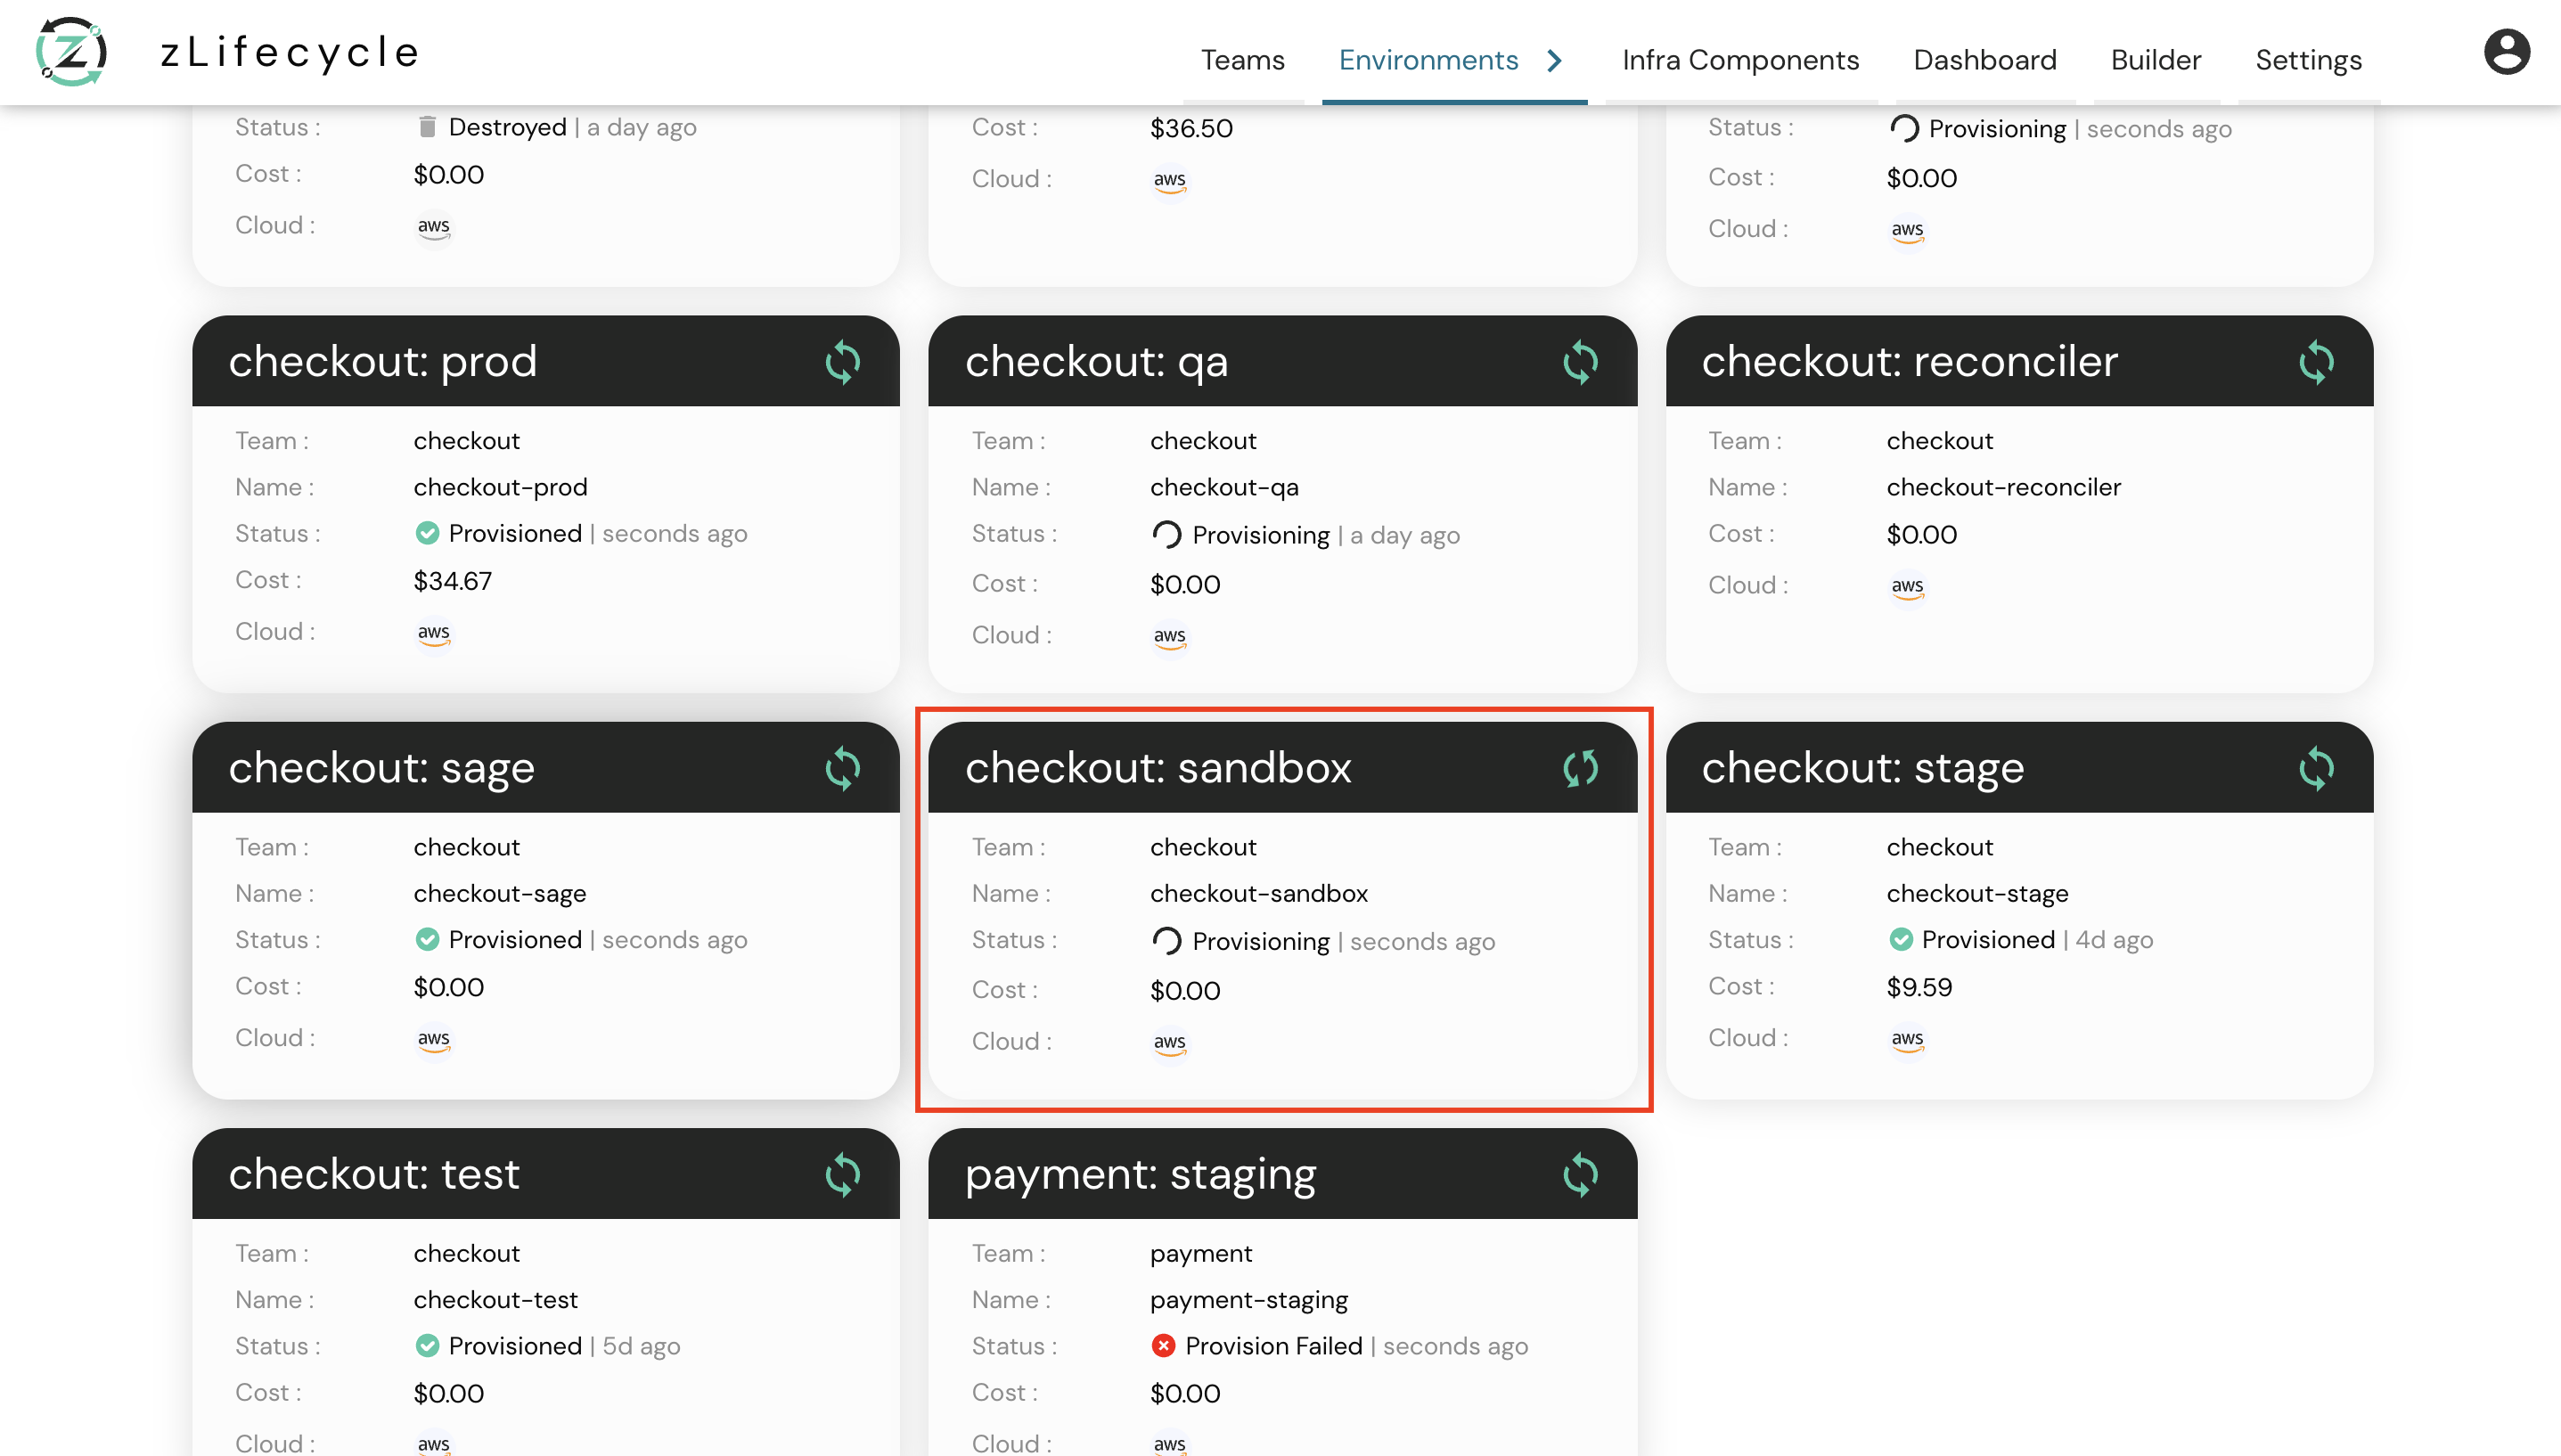
In this sample example we are provisioning an environment called sandbox.
Once your YAML is pushed, you will see a similar card on CloudKnit Environments page.

Click the required environment to navigate to the DAG View.

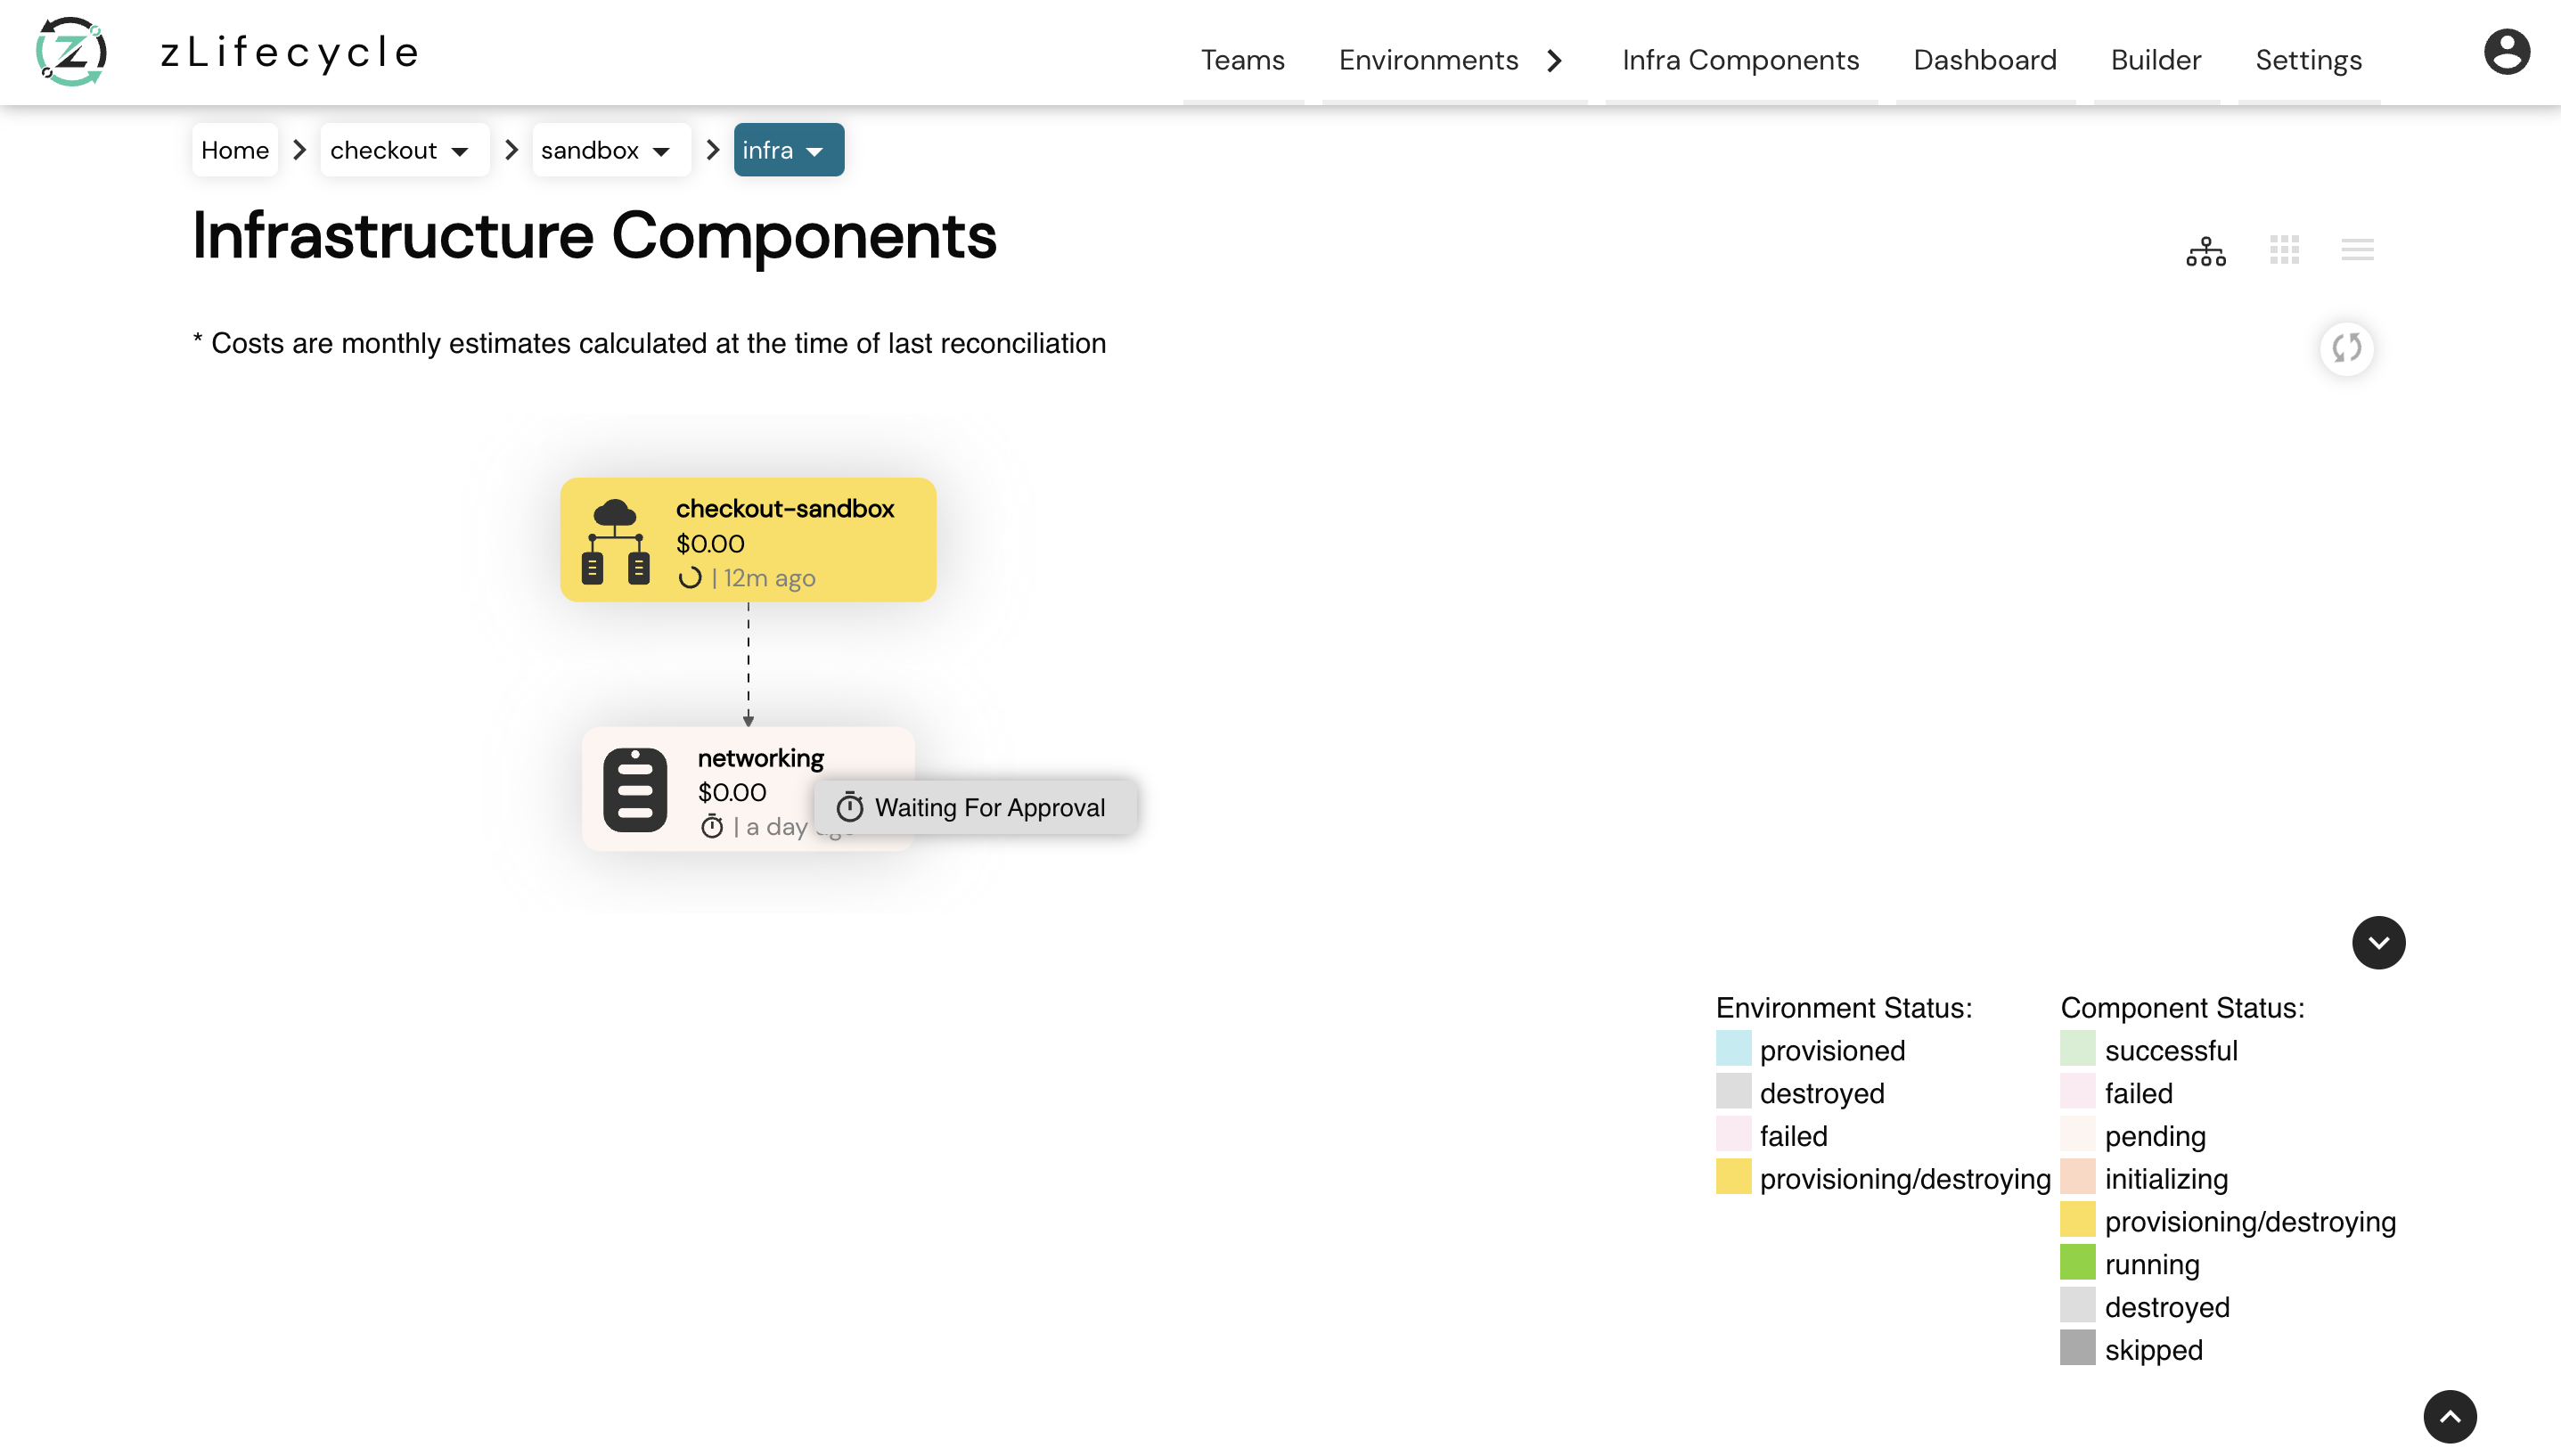
As shown in the above image, with autoApprove as false once our environments plan completes our component now waits for approval for provisioning. Once at this page click on the component which you want to approve.

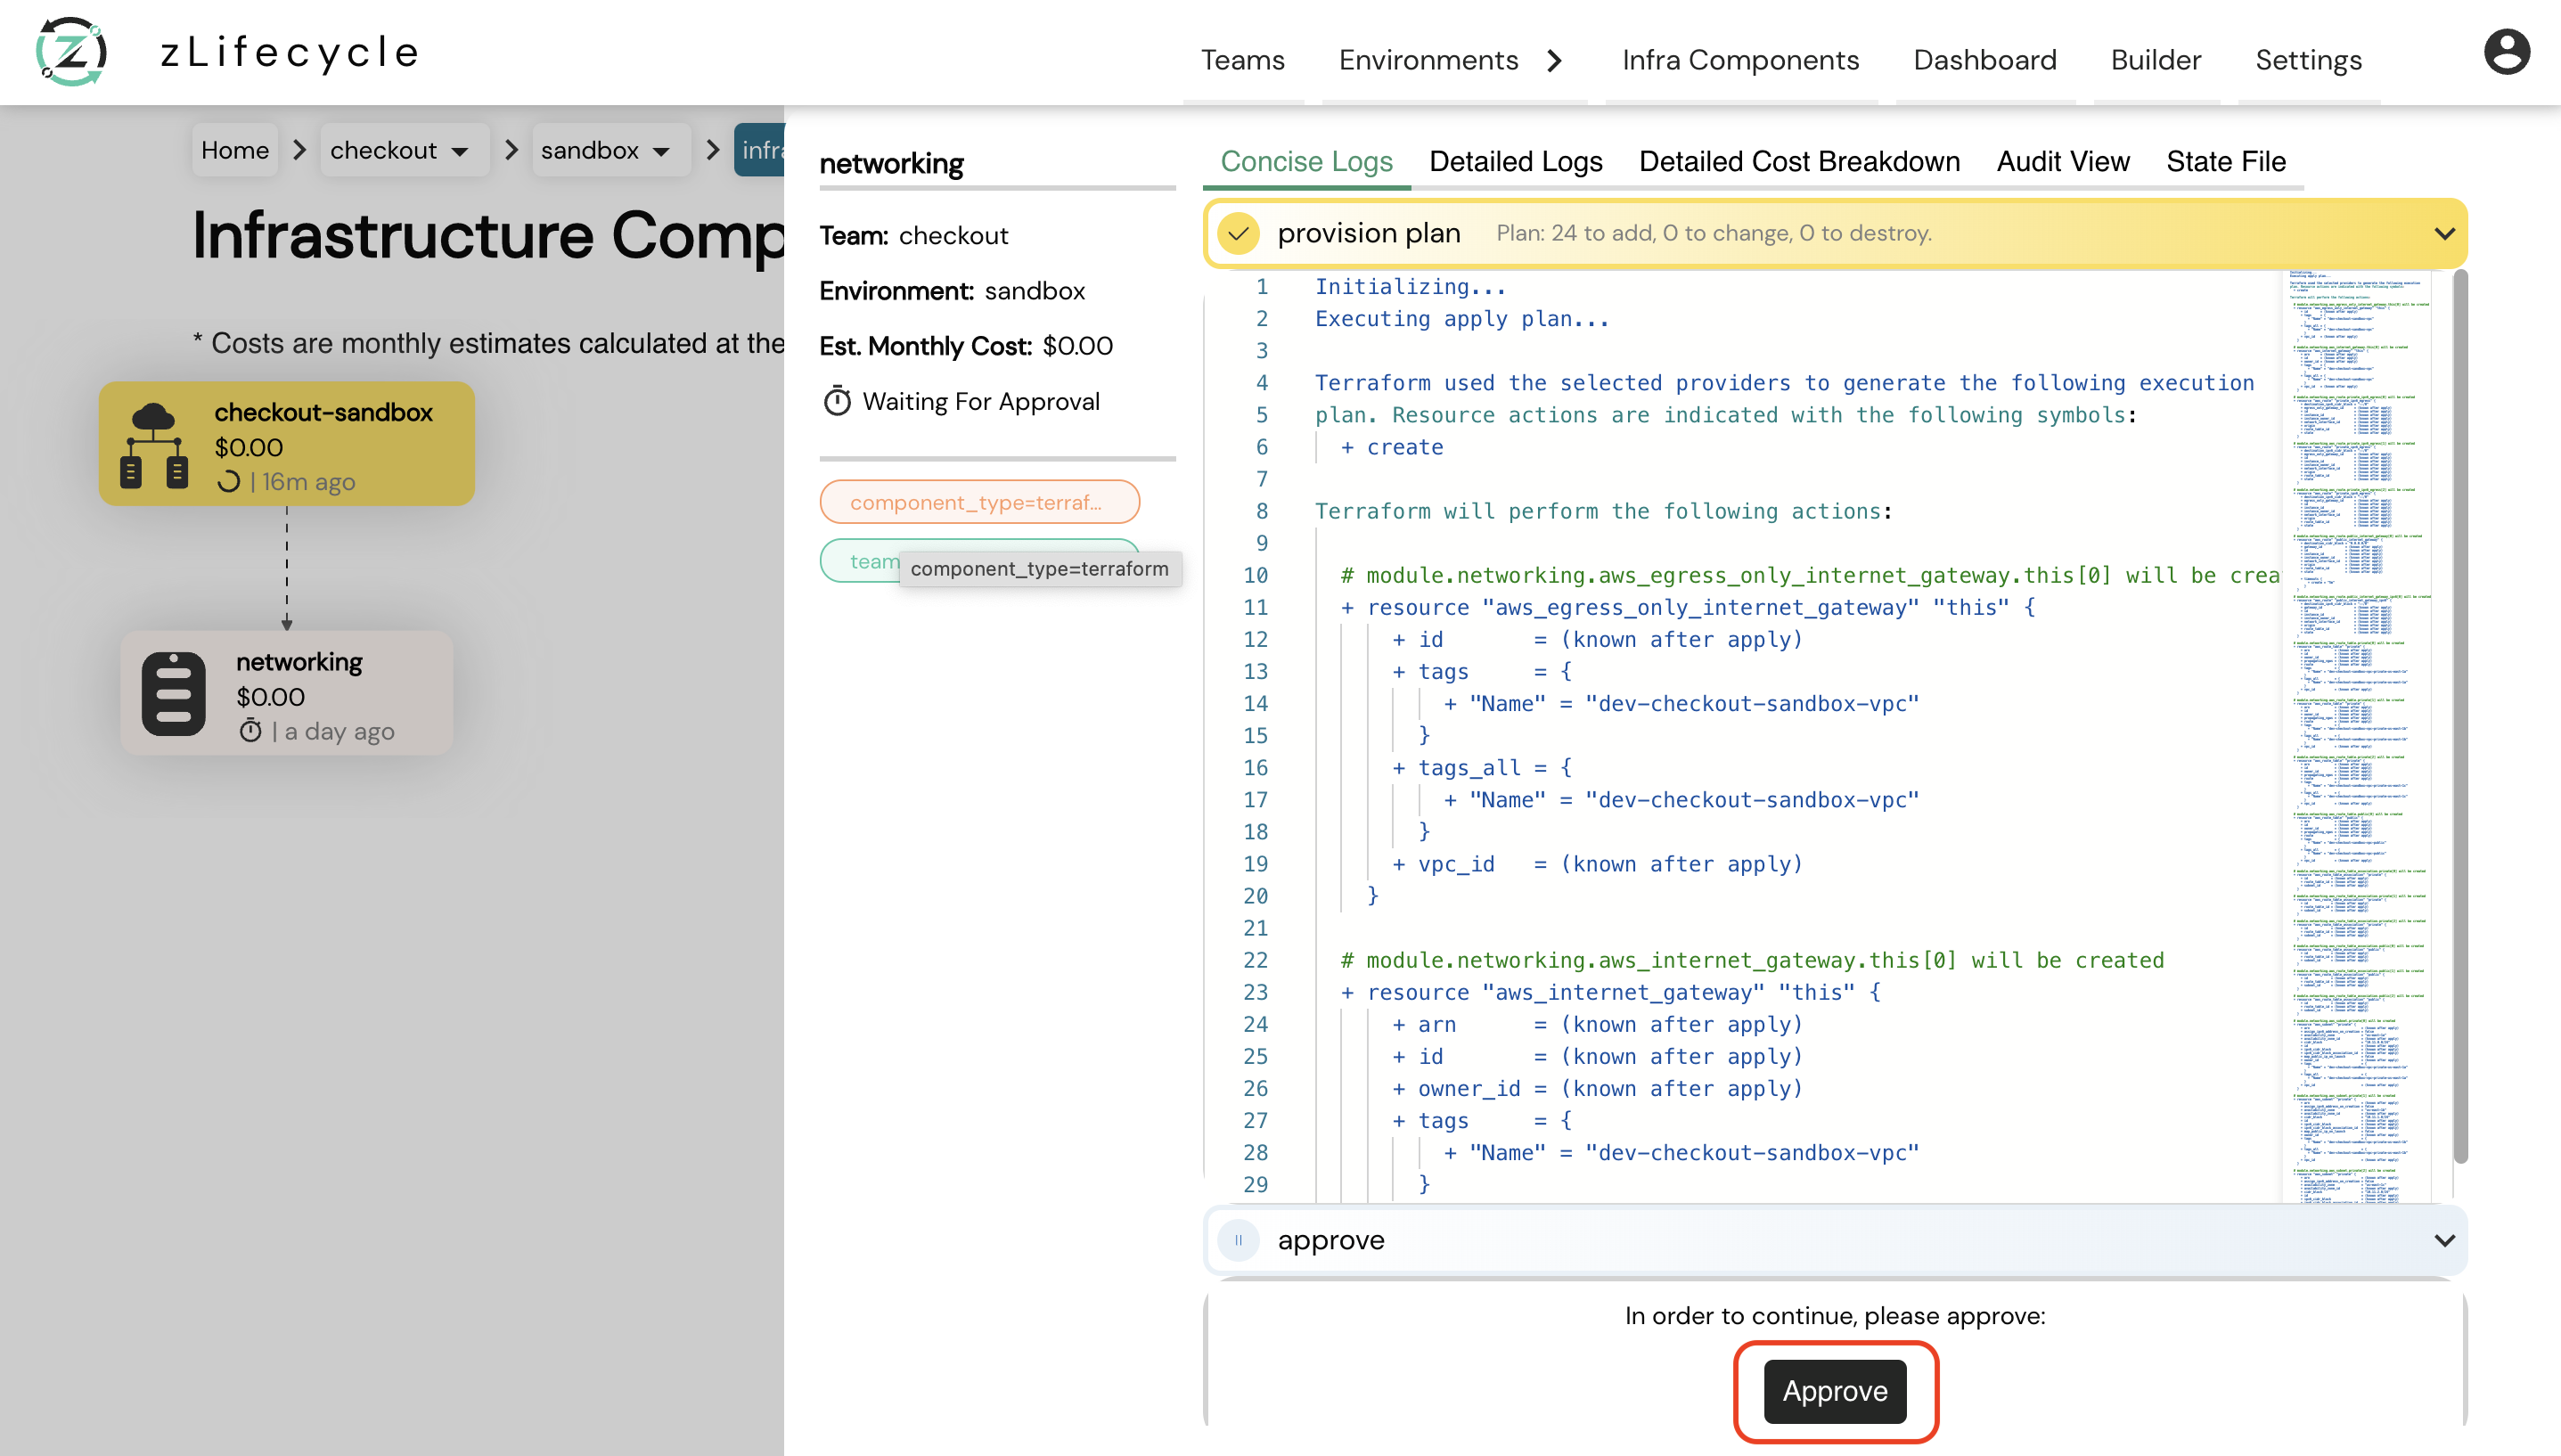
Once clicked, you will see a right panel (which is a component details view) as shown in the above image. Now you can click on the approve button and then on the confirm button to continue with the provisioning of your environment.
Click here to know more about the component details view
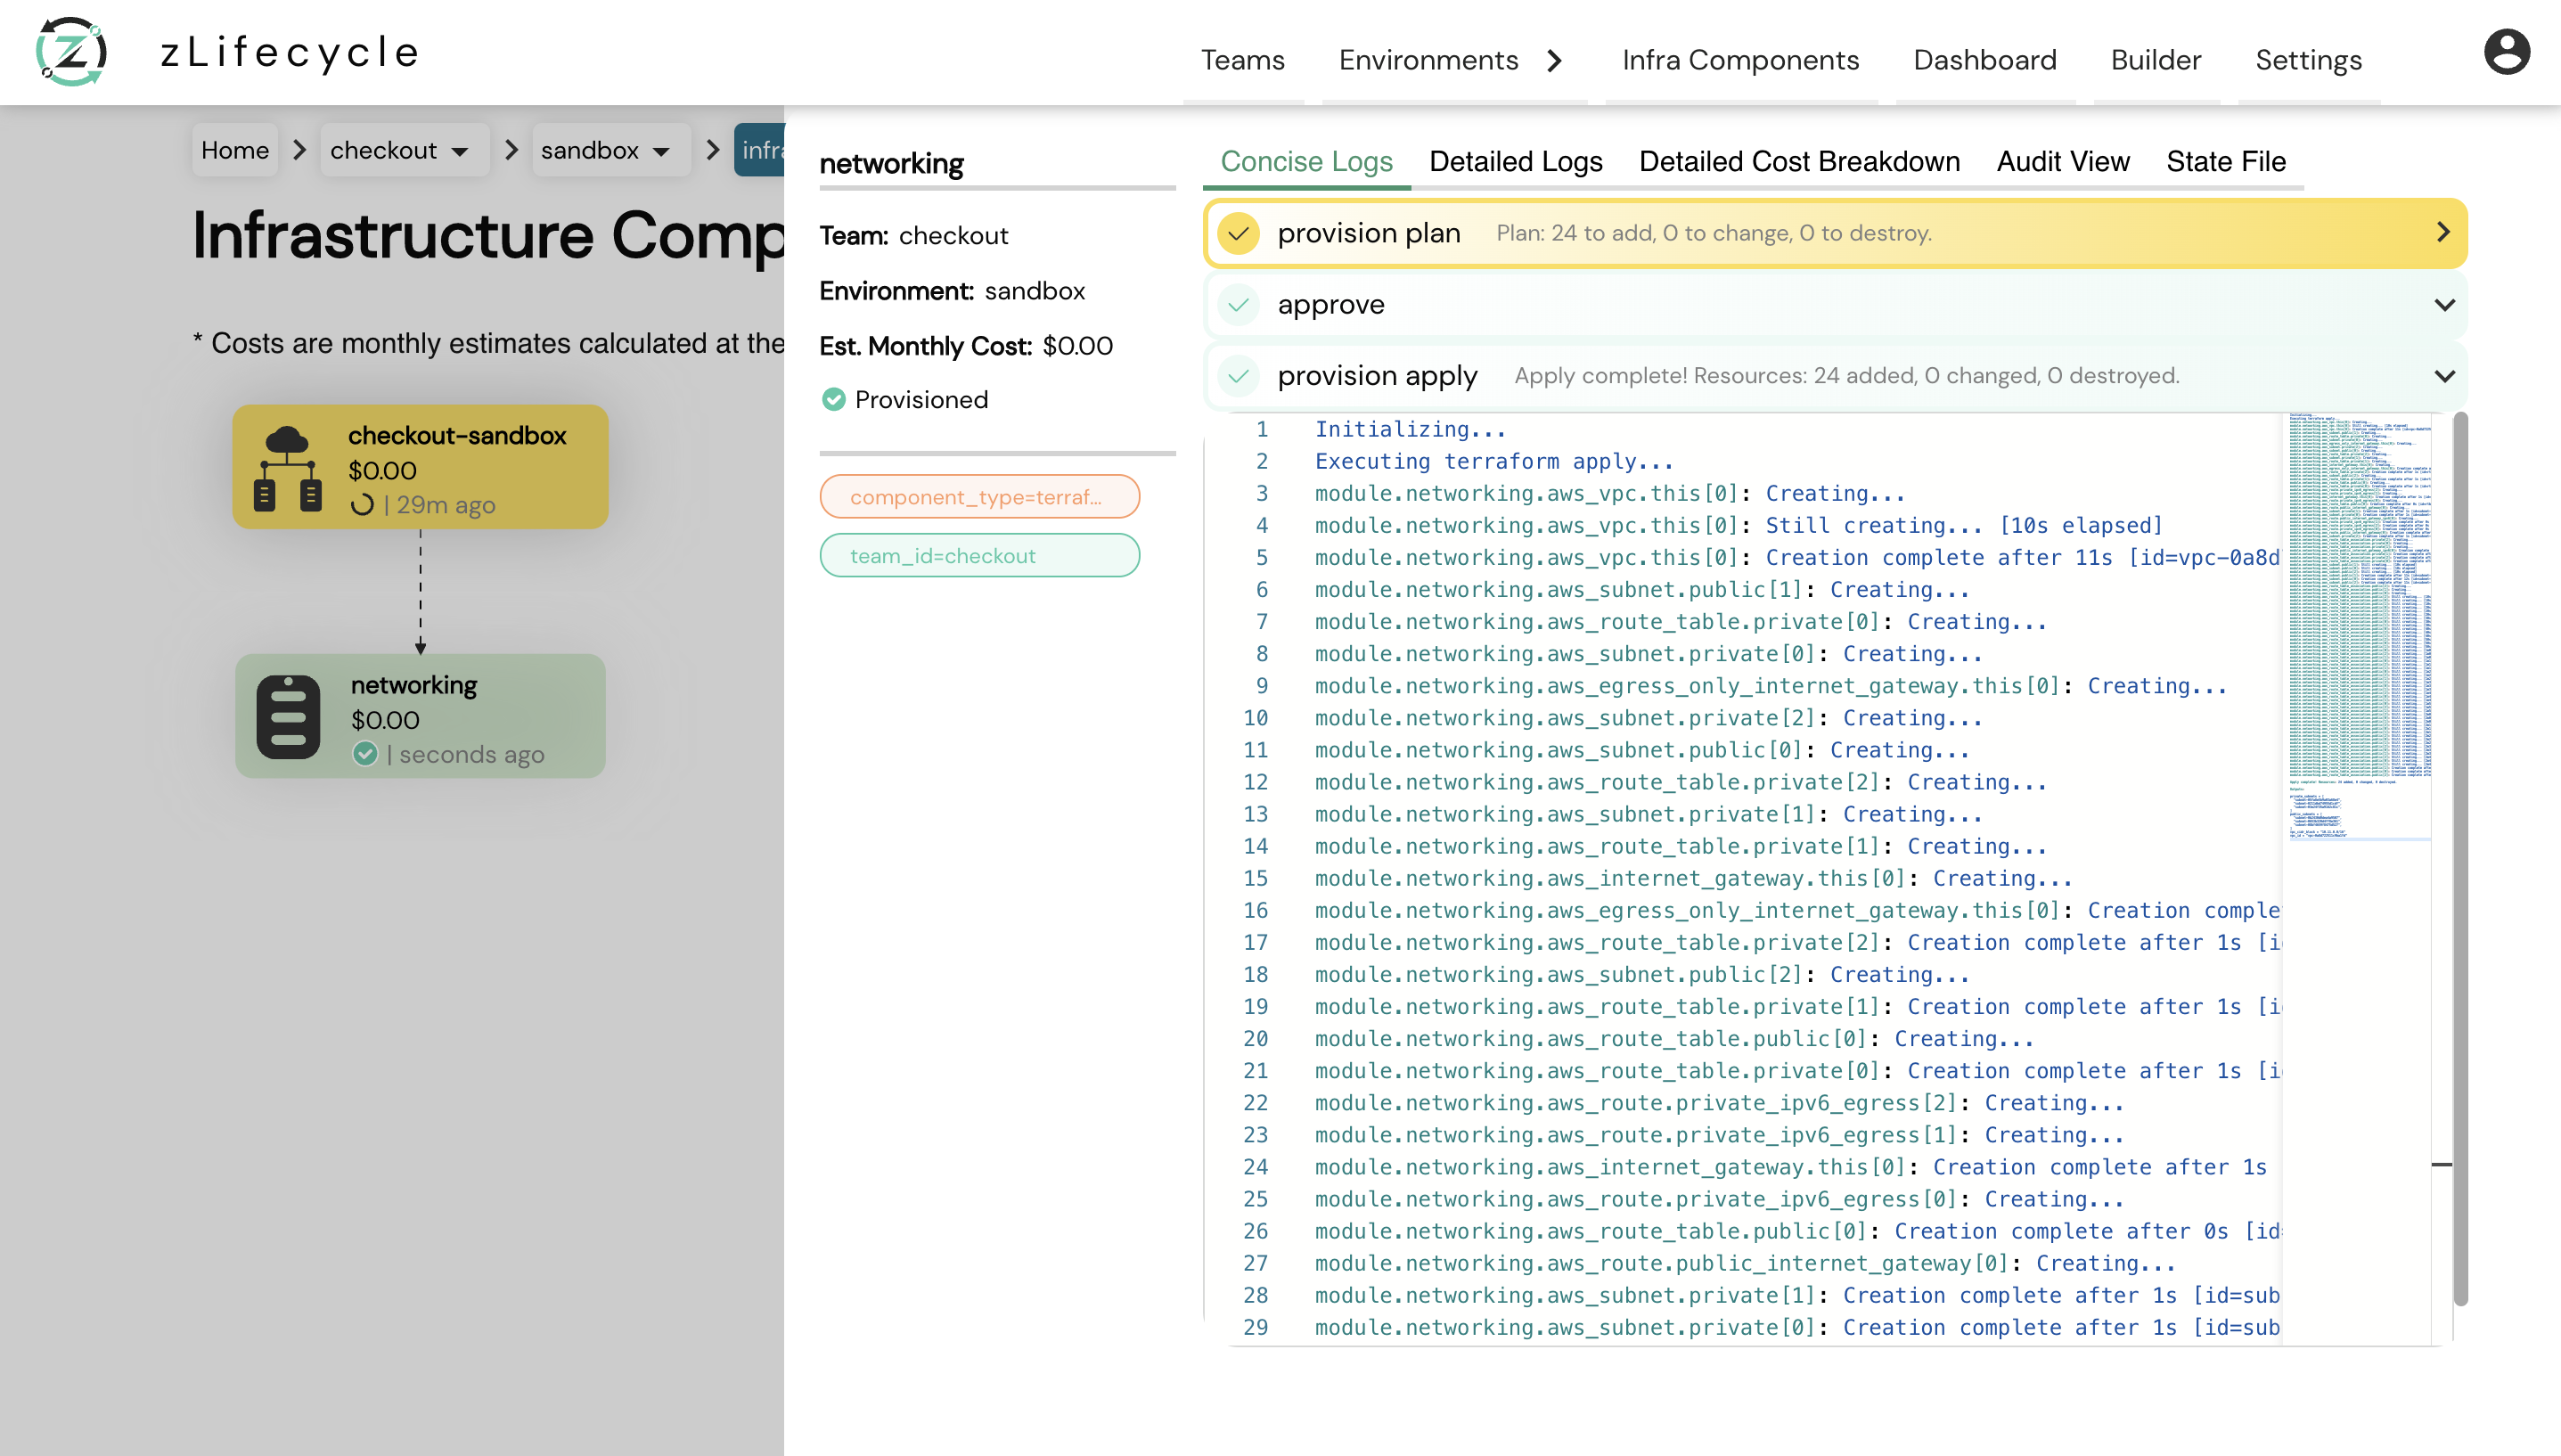
Once approved, wait for CloudKnit to provision your environment. After its completed, you will see a similar view to the image below:
